Time : April 28, 2023
Abstract: This article introduces the characteristics of ceramic (ball) materials, the application characteristics of ceramic ball bearings, and various inspection and detection methods for ceramic balls. Sensitivity tests were conducted on the penetrant for ceramic ball fluorescence penetration testing using TP series test blocks, and the fluorescence penetration testing process was optimized. The experimental results indicate that the optimized fluorescence penetration testing process can effectively detect surface micro cracks of ceramic balls.
Keywords: ceramic balls for bearings; Fluorescent penetrant testing; reliability
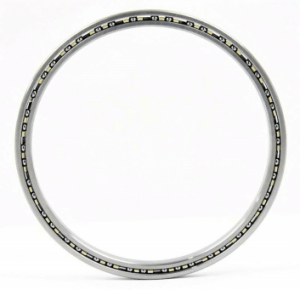
Traditional steel bearings, relying on improvements in structure and lubrication conditions, are no longer able to meet the requirements for use in high-speed and high-temperature environments. The hybrid ceramic ball bearing composed of steel inner and outer rings and ceramic balls (hereinafter referred to as “ceramic ball bearing”) has become the best choice for engine rotor support [1], and its appearance is shown in Figure 1.

Ceramic balls used in bearings have characteristics such as high temperature resistance, wear resistance, corrosion resistance, electromagnetic insulation, and oil-free self-lubrication, which are incomparable to metal steel balls. Ceramic materials not only possess all the important characteristics of bearing materials, but also can withstand harsh working environments that metal and polymer materials cannot withstand.
Ceramic ball bearings have been widely used in aerospace engines, high-precision and high-speed machine tools, petrochemical machinery, metallurgical machinery, and other fields, and the quality control of ceramic balls is particularly important. The author conducted sensitivity tests on the penetrant for ceramic ball fluorescence detection, optimized the fluorescence penetration detection process, and achieved good experimental results.
1.Characteristics of Ceramic Materials and Application Characteristics of Ceramic Ball Bearings
(1) The weight of high-speed ceramic materials is only 40% of the weight of steel, which can achieve lightweight and high-speed bearings. When aerospace engine ceramic ball bearings rotate at high speed, they can reduce the rolling load caused by centrifugal force. The rotational speed of ceramic ball bearings can reach 1.3-1.5 times that of steel bearings.
(2) The elastic modulus of highly rigid ceramics is 1.5 times that of metals, and after being subjected to force, the elastic deformation is small. The stiffness can be increased by 15% to 20%, thereby reducing machine tool vibration. It has good application value in high-precision systems.
(3) The hardness of long-lived ceramics is more than twice that of metals, which can reduce wear and has good wear resistance. The tensile strength and bending strength of ceramics are equivalent to those of metals; The compressive strength is extremely high, about 5-7 times that of metal materials; Especially under high temperature conditions, it can still maintain high strength and hardness. The lifespan of ceramic ball bearings with good pressure resistance is usually 3-5 times longer than that of steel bearings.
(4) The friction coefficient of low heating ceramic materials is relatively small, only about 30% of that of standard bearing steel; Compared with metal materials, ceramics have poor thermal conductivity; Therefore, ceramic ball bearings generate less heat during operation, which can extend the lifespan of the lubricating grease.
(5) The coefficient of thermal expansion of low thermal expansion ceramics is about 20% of that of steel, so the size of ceramic ball bearings is less affected by temperature, and the generated thermal preload is low, thus avoiding fatigue flaking caused by heat accumulation.
(6) The inactive chemical properties of corrosion-resistant ceramic materials endow ceramic ball bearings with certain corrosion resistance, making them suitable for applications with complex chemical properties.
(7) When using steel bearings in a non magnetic and strong magnetic environment, the micro powder worn from the bearing itself is adsorbed between the rolling element and the raceway surface, becoming the main reason for premature peeling damage and increased noise of the bearings. Due to its complete non magnetic nature and normal load-bearing capacity, ceramic ball bearings can be used in situations where complete non magnetic properties are required.
(8) Insulating ceramic materials have a high electrical resistivity and can be used as good insulation materials to protect bearings from arc damage.
2.Quality inspection methods for ceramic balls
From the perspective of fracture mechanics, the surface defects of product parts are more harmful than the internal defects, so the surface defects of ceramic balls and their inspection methods are mainly analyzed.
2.1 Common surface defects of ceramic balls
The common surface defects of ceramic balls include cracks, pits, snowflakes, scratches, abrasions, etc.
The main reasons for surface defects are: cracks on the surface of ceramic balls caused by grinding discs with poor sphericity of the ball embryo; Dents generated by abnormal abrasive particles during processing; Scratches and scratches caused by incorrect processing pressure and unbroken hard abrasive particles during the precision grinding process.
2.2 Inspection methods for ceramic balls
In addition to controlling the manufacturing process, non-destructive testing is one of the main methods to ensure the quality of ceramic balls.
The surface of ceramic balls is black and shiny, and the main methods for inspecting surface defects of ceramic balls are: visual inspection under strong light; Using dye penetrant testing method; Adopting fluorescence penetration testing method; Visually inspect with a magnifying glass below 10x; Detected by scanning electron microscopy. An example of the surface morphology of ceramic balls under various inspection methods is shown in Figure 2.
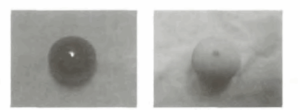 (a)Visual inspection under strong light (b)Dye penetrant testing

(c)fluorescent penetrant testing (d)Visual inspection under magnifying glass
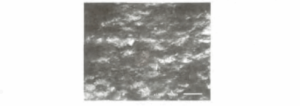
Scanning electron microscopy detection
From Figure 2, it can be seen that in order to reliably detect surface fine cracks, it is important to choose an appropriate inspection method.
3.Penetrant Testing of Ceramic Balls
For the detection of surface defects, conventional non-destructive testing methods mainly include magnetic particle testing, penetration testing, and eddy current testing. Based on the characteristics of electrical insulation and non magnetic conductivity of ceramic balls, it is more appropriate to choose a penetration testing method for detecting surface defects of ceramic balls.
3.1 Principles of Penetrant Testing
When the surface of the workpiece being tested is coated with a penetrant containing dye or fluorescent dye substance with high permeability, due to capillary action and wetting effect, the penetrant penetrates into the open defects on the surface of the workpiece; Then, clean and remove the excess penetrant on the surface of the workpiece, but retain the penetrant in the defect; Then spray the imaging agent on the surface of the inspected workpiece, and the penetrant in the defect is re adsorbed to the surface of the workpiece under capillary action, forming defect traces; Under the irradiation of white light (dye) or ultraviolet light (fluorescent dye), the colored image traces of defects can be observed (under white light) or fluorescent image traces (under ultraviolet light), and the properties of defects can be evaluated.
3.2 Sensitivity Test for Fluorescent Penetrant Testing
Use TP series sensitivity test blocks for sensitivity testing.
The artificial defect depths on the sensitivity test blocks are 10, 20, and 30, respectively μm; Each test block is labeled as TP-20, TP-20, and TP-30. The test results are shown in Figure 3.
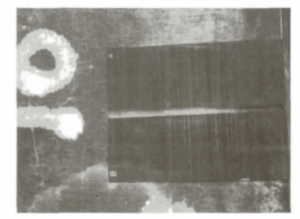
(a)Defect depth 10 μ m

(b)Defect depth 20 μ m
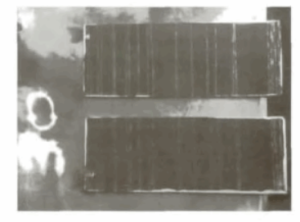
(c)Defect depth 30 μ m
From the test results of high sensitivity test blocks, it can be seen that each test block can display clear traces, indicating that the penetrant system used meets the requirements.
According to the process requirements, TP-20 (artificial defect depth of 20) was finally selected μ m) The test block serves as a reference block for ceramic ball testing.
3.3 Optimization of Fluorescent Penetrant Testing Process
The surface cracks of ceramic balls are relatively small, and the fluorescent penetration method is applied to detect ceramic ball bearings in aerospace engines. In order to improve the reliability of ceramic ball fluorescence penetration testing and ensure product quality, the ceramic ball fluorescence penetration testing process has been optimized. The optimized process flow is as follows:
After a large number of testing experiments, it has been proven that the optimized fluorescence penetration testing process can detect fine crack defects on the surface of ceramic balls.
4 Conclusion
TP series test blocks were used for sensitivity testing of the penetrant for ceramic ball fluorescence detection, and the fluorescence penetration process was optimized. The detection results showed that the optimized fluorescence penetration detection process can effectively detect micro cracks on the surface of aerospace engine ceramic balls.
More about XBRG Thin Section Bearings:
Thin Section Bearings as listed below are available open, shielded or sealed. Available in a variety of standard and custom inch and metric sizes, our thin section bearings offer high performance in corrosive and non-corrosive environments where space devoted to bearings is at a minimum.
